Drone Mapping Missions with DJI PILOT: A Complete Guide
Drone mapping has revolutionized several industries, from agriculture to construction, by providing exceptionally precise imagery. For those who own a DJI drone, the DJI PILOT app becomes an indispensable companion. In this article, we’ll detail every step to set up a mapping mission seamlessly and successfully.
Introduction to DJI PILOT
Before diving into the details of mission setup, let's briefly introduce DJI PILOT. This app is part of DJI's ecosystem and is tailored for professional drone pilots, particularly those using DJI's Matrice series drones. It provides a user-friendly interface and a range of features that simplify mission planning, execution, and data collection.
Pre-Mapping Preparation
1. Equipment Check
Before heading out, it's crucial to ensure that all your equipment is in optimal working condition. This includes the drone itself, the remote controller, the tablet or smartphone running the DJI PILOT app, and the drone's batteries. Make sure everything is charged and updated with the latest firmware. Additionally, it’s crucial to calibrate the drone's compass and confirm a robust GPS connection.
2. Mission Planning
Successful mapping missions start with planning. Consider the following factors:
- Area to be Mapped: Define the specific area you intend to map. This will determine the flight path and the number of waypoints needed.
- Altitude and Overlap: Determine the optimal altitude for your mission, which affects the ground resolution of your imagery. Plan for sufficient overlap between images to ensure accurate data capture.
- Flight Speed: Adjust the drone's flight speed based on the desired image quality and data accuracy.
- Safety Precautions: Check for any airspace restrictions or no-fly zones in your mission area. Ensure safety protocols are in place.
Setting Up Your Mission with DJI PILOT
3. Launch DJI PILOT
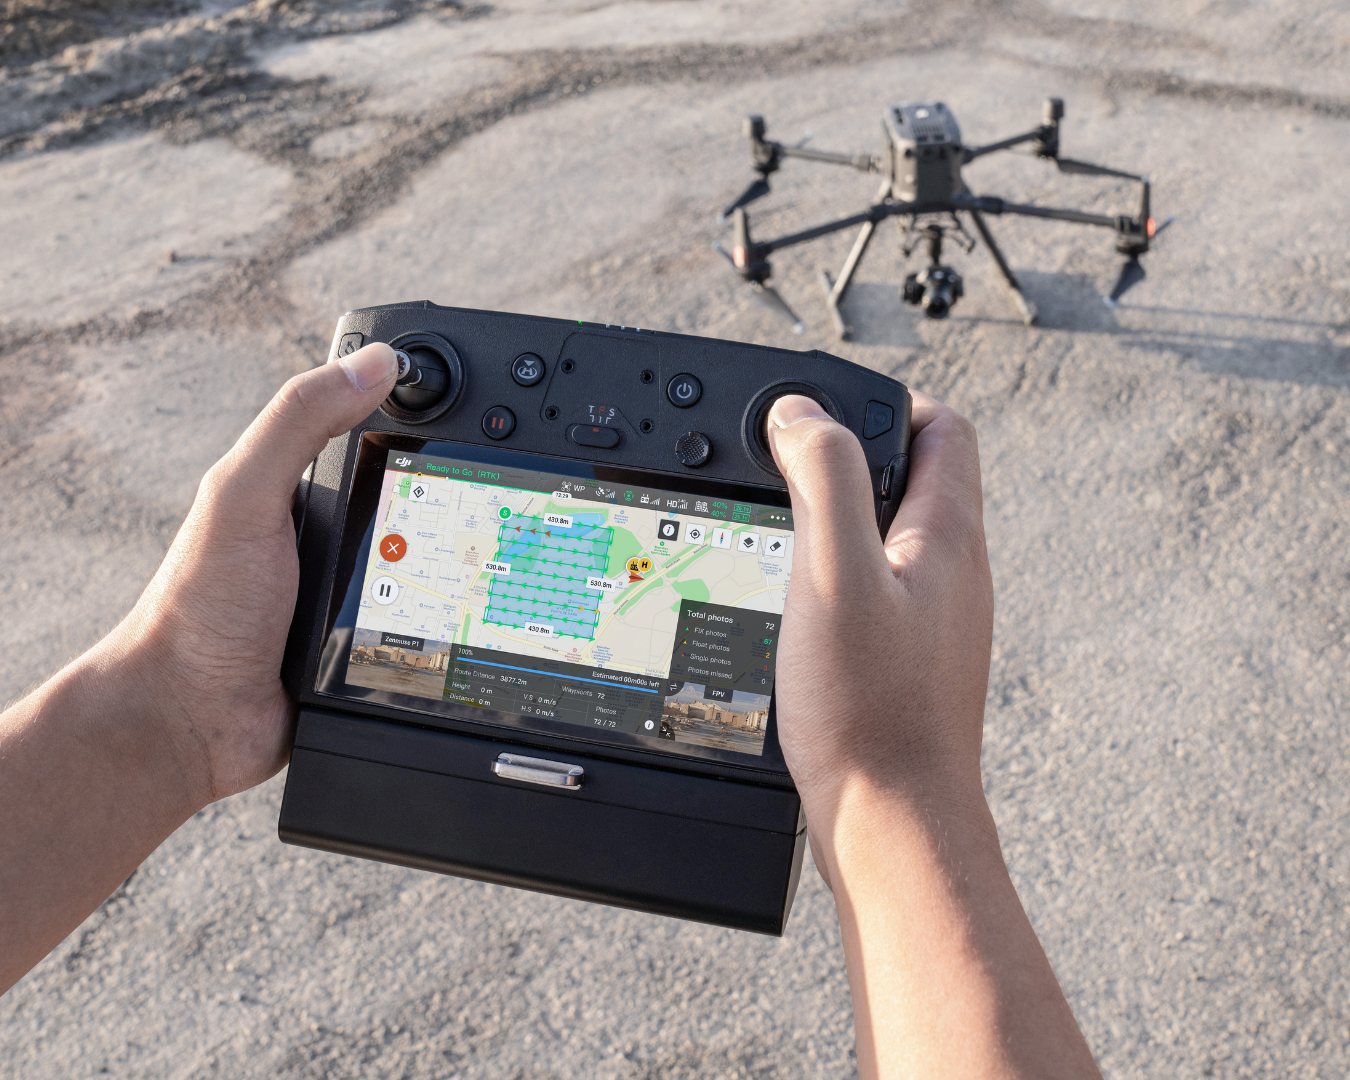
Activate your drone and controller, pair them with your mobile device, and initiate the DJI PILOT app. The primary interface will showcase a live feed from the drone's camera.
4. Create a New Mission
On the dashboard, find the 'Flight Mode' option and choose 'Mapping Mission'. The type of mission may vary based on the DJI model, but we're concentrating on the primary mapping mission for this guide. Here you can enter the relevant details such as the mission name, location, altitude, and desired overlap settings.
5. Defining DJI Flight Parameters
Using the DJI PILOT app's intuitive interface, you can create:
- Flight Route Strategy: Mark the target mapping area. Adjustments can be made manually or through automatic plotting.
- Altitude & Speed Decisions: Opt for lower altitudes for enhanced image resolution. Modify the flight speed according to current conditions.
- Overlap Configuration: Ensure images overlap for smooth post-processing stitching, generally setting it between 70% to 80%.
6. Perfect Camera Settings with DJI PILOT
- Camera Mode: 'Interval' mode is ideal for regular interval snapshots during flight.
- Camera Angle Selection: The camera should focus downward, capturing the terrain effectively.
- Image Quality: RAW offers superior data for post-processing compared to JPEG. Prioritize the highest resolution.
7. Takeoff and Execute
Inspect all parameters pre-launch. Confirm the drone's flight path is obstacle-free. Use DJI PILOT for auto-takeoff or opt for a manual launch. Once the drone has taken off, it will automatically follow the predefined flight path, capturing images at each waypoint. During the flight, monitor the drone's live feed during its flight. The app provides instantaneous mapping visuals, enabling necessary in-mission adjustments.
8. Data Collection
As the drone completes its mission, high-resolution images are collected and stored on the onboard storage device or an external SD card. Ensure that you monitor the mission's progress and the drone's battery levels throughout the flight.
Post-Mission Data Processing
9. Data Transfer
After the mission is complete, transfer the captured imagery to your computer for further processing. Organize the images and ensure they are in the correct sequence.
10. Data Processing Software
Use specialized mapping and photogrammetry software to process the images into accurate 2D maps or 3D models.
Learn how DroneMaps is simplifying and automating data processing, without compromising on precision and accuracy.
11. Quality Control
Thoroughly review the processed data for any errors or inaccuracies. Make necessary adjustments to enhance the quality of your final mapping product.
Conclusion
The DJI PILOT app stands as a powerful ally in the realm of drone mapping missions, streamlining the setup process and elevating the quality and accuracy of the data you collect. By following the simple steps we've outlined in this guide, you not only ensure a hassle-free and efficient mission setup, but also unlock the potential for capturing exceptional aerial data that can truly transform the way you approach and execute your projects. With the DJI PILOT app in your toolkit, the sky is no longer the limit; it's the starting point for precision, quality, and successful outcomes for every project.
Need more help? contact us for support